I love eating this meal because it makes me feel virtuous, yet satisfied. Lentils are undeniably healthy as well as eco-friendly and they taste delicious. They are also simple and quick to prepare.
I generally serve these lentils as they are, over rice. Sometimes, I might add a bit of bacon, sauted with the onions at the beginning. They also taste wonderful as a side dish accompanying sausages, duck or lamb. If you add more water, then it becomes a satisfying soup.
My secret ingredient in this dish is to add a piece of parmesan rind. I always save the hard end bits of the parmesan in a bag in the refrigerator. Then I throw them into stews and soups. It adds a subtle unami flavor to the broth.
Finally, don't forget to serve it with lemon wedges and let everyone season their own dish. The lemon really brightens up the earthy flavor.
Lentils and Spinach:
1 cup small green lentils
4 to 5 cups water
2 carrots
2 onions
2 stalks celery
a few cloves garlic
2 vegetable bouillon cubes
small bunch of your choice herbs
2 bay leaves
a bit of parmesan cheese rind
about 150 grams fresh baby spinach
salt and pepper to taste
olive oil for frying
lemon and parmesan to garnish
Rice:
1 cup white rice
2 cups water
Prepare your vegetables. Peel and dice the onions and garlic. Peel and chop the carrots
into small pea-sized pieces. Chop the celery.
Heat a large pot on medium and put in a tablespoon or two of oil. Add the onions, carrots and celery. Saute for 5 minutes or so, stirring occasionally, until the onions are transclucent and starting to color. Add the garlic and cook for another minute or two. Add the lentils, herbs, bouillon cubes, bay leaves, and parmesan rind. Add 4 cups of water. Stir until the bouillon cubes are dissolved. Bring the water to a boil, put on the lid and let simmer for about 30 minutes or until the lentils are tender but still retain a bit of bite. Taste and adjust for seasoning. At this stage, you can pull out the bay leaves and the chunk of parmesan rind. Pour in the spinach leaves and put the lid on again. Wait a minute or two and then stir the spinach into the lentils. The heat of the lentils will wilt the spinach.
Meanwhile, put the rice and the water in a pot on the stove. Turn the heat up and bring the water to a boil with the lid on. Immediately turn the stove down to the lowest possible heat, keeping the lid on. Cook for 20 minutes or until the rice is done.
Serve the lentils on top of the rice. Garnish with a dusting of parmesan and lemon wedges on the side.
Wednesday, March 25, 2015
Monday, March 23, 2015
Slow Roasted Lamb with Garlicy White Beans and Kale
I like a lazy Saturday or Sunday, puttering around the house with no bigger plan than thinking about what I will cook for dinner. A long slow roast infuses the kitchen with good smells, and most of the work is done by the oven while I curl up on the sofa with a good book.
This leg of lamb fits the bill. Lamb with garlic is a classic combination and you can throw in whatever herbs you like but for me, rosemary is a must. Here in Sweden, it is a bit challenging to get a leg of lamb with the bone. I rarely see it at my local supermarket and have to go to the food halls if I want one. While I normally prefer my leg with the bone, as I am a firm believer that the bone gives the meat a better flavor, I have found that the de-boned version has its charms. The main charm being that I can liberally stuff it with garlic and herbs so that all of the meat is infused with flavor.
I decided to eschew the normal roast potatoes and veg for a simple side of brothy beans and kale flavored with more garlic. The dish is based off a side dish that I had often in a little mountain restaurant in France near Perpignon where we used to have a small summer house. I like to make the beans just after I put the lamb in the oven and then let them sit on the back of the stove while the lamb is cooking so that all the garlic flavors infuse into the beans. Then I just heat them up again while I am making the gravy.
Serves 4 to 6
Roast Lamb:
1.5 kilo leg of lamb without bone
1/2 head of garlic
bunch of oregano and rosemary
salt and pepper
olive oil
Preheat the oven to 165C. Peel
and chop the garlic finely. Chop the herbs. Rub salt and pepper all over the leg of lamb and inside the hole left by the bone. Mix the garlic and herbs with a bit of olive oil. Put the majority of the mixture in the hole and rub a bit on the outside of the leg. Put in the oven and leave to roast for about 3 hours. The meat should be browned on the top and very tender.
Gravy:
juices from the lamb
two tablespoons capers, chopped
a slug of port or marsala
a teaspoon of cornstarch
a bit of water
This won't make a big jug of gravy, just enough for a tablespoon or two per person to moisten the meat. When the meat is done, lift it out onto a cutting board and cover with a piece of tinfoil and let it rest while you prepare the gravy. If there is a lot of fat in the pan, you can tilt the pan and use a spoon to remove some of it. Use a spatula to scrape the bottom of the pan to get all the nice bits of carmelized juices into the sauce. Put the pan on the stove if you can, or pour the juices into a little pot and bring them to a boil. In a cup, put in a few tablespoons of water and a teaspoon of cornstarch and stir until the cornstarch is fully dissolved. Add this to the juices and stir and cook until the sauce thickens a little bit. Add the chopped capers and a tablespoon or two of wine. Taste and adjust the seasoning. If it is too salty, add a bit more water and wine. Pour into a bowl and serve with the meat.
Beans and Kale:
2 cans large white beans
200 grams kale or other greens
1/2 head of garlic
small bunch of thyme
1 carrot
1 stalk of celery
1 onion
olive oil
1 vegetable bouillon cube
salt and pepper
about a cup water
Peel and chop the garlic. Peel the carrot and chop finely. Chop the celery and the onion finely. In a pot, put on a stove at medium heat and add a generous slog of olive oil. Put in the vegetables and saute for a few minutes, taking care not to let the garlic burn. While the onion mix is cooking, prepare the kale. Cut the rib out of each leaf of kale and then cut the kale into pieces. Open the cans of beans, pour into a colander, drain, and rinse with cold water.
Add the water to the onion mix, the bouillon cube, and the kale. Let it boil up for a few minutes until the kale softens. Add the beans and stir gently so that you don't break the beans. Put the lid on and let the mixure simmer for about 15 minutes. Check for seasoning and add a slug of oil oil if you like.
Friday, March 20, 2015
Scones and Lemon Curd
I take great exception to the huge pastries
that are ubiquitous in every American bakery and supermarket that they call
“scones.” Sweet and filled with all
kinds of fruit from cranberries to apricots and the size of a doughnut, these
pastries, while some may like them, are not scones. Indeed they defy the entire spirit and quiet
beauty of a scone. First, a scone should
be eaten hot from the oven. Cold, they
lose half of their appeal. Second, the scones should have very little
flavoring, just a small smattering of sugar, and perhaps a bit of lemon
zest or a small amount of currants, if you must. Then, scones should be eaten with strawberry jam or lemon curd (or both!), and either whipped cream or clotted
cream. The contrast between the warm,
flakey, buttery biscuit and the sweet jam mixing with the richness of the cream
is sublime. Don’t settle for less. Make these and understand why scones are so
beloved. You will never eat a grocery
store scone again.
Cream Scones
2 cups flour
2 teaspoons baking powder
2 tablespoons sugar
1/2 teaspoon salt
4 tablespoons of COLD butter (60 grams)
1/2 cup cream
2 eggs
Preheat the oven to 425F (220C).
With a food processor:
In a food processor, pour in the dry ingredients. Pulse for a few seconds to combine. Add the butter and pulse for about 20 to 30 seconds until the mixture resembles cornmeal.
By hand:
In a large bowl, pour in the dry ingredients. Add the butter and cut it with a knife or pastry cutter until it is in small pieces. You can also take your fingers and smoosh the butter and flour between your fingers. You want the butter to be in tiny pieces, so don't overwork it.
Measure out the cream in a masuring cup. Add the eggs into the cup and beat well with a fork to combine. Pour the cream mixture into the food
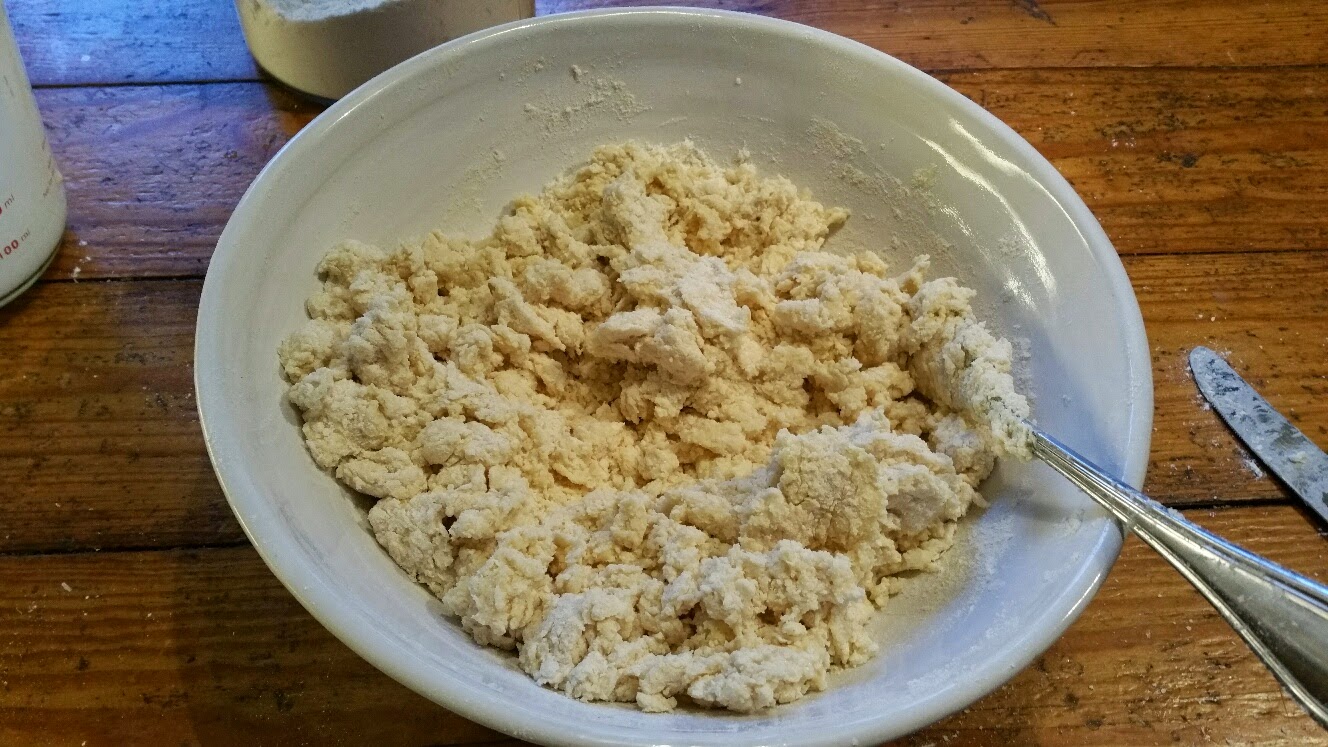
processor and pulse until the mixture is nicely combined but do not mix more than necessary. If mixing by hand, pour the cream and egg mixture into the bowl and use a fork to mix into the dry ingredients. Stir until the mixture comes together and starts to form a ball.Turn out the dough onto a floured board. The mixture will be sticky and fairly loose. Dust your hands with plenty of flour and knead the dough for 30 seconds or so. Roll or pat the dough out with your hands to about 1/2 to 3/4 inch thick. Cut into wedges, diamonds, or squares. You can cut circles out, also, but the more you re-knead the dough, the less flakey the scones will be. Place on a buttered baking sheet. Bake until puffed and golden brown.
For small scones, about 24, bake 8 to 10 minutes.
For medium sized scones, about 12, bake about 15 minutes.
Serve hot with jam or lemon curd and
whipped cream or clotted cream.
Lemon Curd
Makes about 2 cups (500ml)
4 large lemons, zest and juice (about 1 1/3 cups/250 ml)
150 grams butter
200 to 250 grams sugar
1 tablespoon cornstarch
3 eggs plus 2 yolks
Zest the lemons into a large heat-proof boil that you can put over a pan of boiling water. Juice the lemons and pour into the bowl. Add the sugar, cornstarch, and butter. You can adjust the sugar more or less, depending on how sweet you would like your curd and how much juice your lemons give. Heat some water in the pan to boiling, making sure that the water is below the level of the bowl. When the water is boiling, put the bowl on top of the pot and stir or whisk until all the ingredients are incorporated. For the next 5 minutes, stir occassionally, keeping a close eye on the bowl. For the next 5 to 10 minutes, stir constantly until the mixture starts to thicken. Do not despair if nothing appears to be happening, it will thicken when it gets to about 170 F degrees, just under boiling temperature, and how long this takes depends on the heat of your stove and the size of your pot.
Once you feel the mixture thicken, it should start to feel heavier on your spoon or whisk. Continue stirring for another two minutes, but do not let the mixture come to a boil or it will curdle. The mixture should be able to coat the back of a spoon, but will still be runny. It will thicken a bit more as it cools. Pour the curd into very clean jars and refrigerate. It will keep a week or two, more if you steralize the jars and seal them.
Tuesday, March 17, 2015
Simple Supper: Spaghetti alla Puttanesca
My favorite canned olives are green Spanish olives stuffed with anchovies. They come in a tall thinnish can and seem to taste the same, regardless of the brand. You can't really taste the anchovies but they give a delicious "unami" flavor to the olives. I generally keep a can or two in the cupboard to whip out if guests drop by for a drink.
In the summer, this dish tastes fresh but comforting while in the winter, the zesty flavors lift tired palates. So basically, you are good to go, year round.
Serves 4
500 grams spaghetti or other pasta
1 onion
4 cloves garlic
2 teaspoons fresh thyme, plus extra for garnish
8 medium ripe tomatoes
300 grams olives*
4 tablespoons drained capers
salt and pepper to taste
red pepper flakes, if desired
pinch of sugar if necessary
olive oil
Put a large pot of water on to boil for the pasta. While the water is heating, start the sauce. Chop the tomatoes with the skins on. Chop the onion and garlic finely. Chop the thyme.
Add a generous glob of olive oil to a frying pan and turn on the
heat to medium. Add the onions and garlic and saute for a couple of minutes until translucent. Add the chopped tomatoes and thyme. Season with a bit of salt, pepper and red pepper flakes, if you are using them. Stir and let it cook until the tomatoes start to break down. Taste and adjust the salt and pepper. If the mixture starts to look a bit dry, you can add a dash of water or a bit more olive oil. If the tomatoes are not very flavorful, you can add a pinch of sugar to bring out some sweetness.While the tomatoes are cooking, chop the capers and olives.
When the water for the pasta is boiling, add a generous tablespoon or two of salt and add the pasta. Bring the water back up to boiling, stirring occassionally and cook the number of minutes that is stated on the packet. When the pasta is done, take a cup of the cooking water and set aside, and then drain the pasta.
While the pasta is cooking, add the capers and olives to the tomato sauce. Stir and simmer for a minute. Taste and check your seasoning. If you like it a bit more zesty, you can add some of the juice from the olives or capers. Let the sauce simmer until the pasta is cooked. Toss the sauce and the hot pasta together, adding a bit of the pasta water if it looks to dry. Serve with hot, topped with parmesan cheese and a bit of chopped fresh thyme on top.
*If not using olives stuffed with anchovies, add 4 anchovies, finely chopped, with the tomatoes at the beginning.
This zesty pasta has the same "cupboard" mentality because all of the ingredients can usually be found in a well stocked larder. While most recipes for this famous dish use canned tomatoes, I prefer to use fresh ones, even in the winter when tomatoes are not that great. It makes the dish a bit lighter in flavor but by all means, use canned if fresh is unavailable or too fiddly for you. You can also leave out the thyme and the dish will still taste great. But if you can be bothered, the fresh thyme sprinkled on top adds a herbal note which contrasts nicely with the vinegary flavors of the olives and capers.
In the summer, this dish tastes fresh but comforting while in the winter, the zesty flavors lift tired palates. So basically, you are good to go, year round.
Serves 4
500 grams spaghetti or other pasta
1 onion
4 cloves garlic
2 teaspoons fresh thyme, plus extra for garnish
8 medium ripe tomatoes
300 grams olives*
4 tablespoons drained capers
salt and pepper to taste
red pepper flakes, if desired
pinch of sugar if necessary
olive oil
Put a large pot of water on to boil for the pasta. While the water is heating, start the sauce. Chop the tomatoes with the skins on. Chop the onion and garlic finely. Chop the thyme.
Add a generous glob of olive oil to a frying pan and turn on the
heat to medium. Add the onions and garlic and saute for a couple of minutes until translucent. Add the chopped tomatoes and thyme. Season with a bit of salt, pepper and red pepper flakes, if you are using them. Stir and let it cook until the tomatoes start to break down. Taste and adjust the salt and pepper. If the mixture starts to look a bit dry, you can add a dash of water or a bit more olive oil. If the tomatoes are not very flavorful, you can add a pinch of sugar to bring out some sweetness.While the tomatoes are cooking, chop the capers and olives.
When the water for the pasta is boiling, add a generous tablespoon or two of salt and add the pasta. Bring the water back up to boiling, stirring occassionally and cook the number of minutes that is stated on the packet. When the pasta is done, take a cup of the cooking water and set aside, and then drain the pasta.
While the pasta is cooking, add the capers and olives to the tomato sauce. Stir and simmer for a minute. Taste and check your seasoning. If you like it a bit more zesty, you can add some of the juice from the olives or capers. Let the sauce simmer until the pasta is cooked. Toss the sauce and the hot pasta together, adding a bit of the pasta water if it looks to dry. Serve with hot, topped with parmesan cheese and a bit of chopped fresh thyme on top.
*If not using olives stuffed with anchovies, add 4 anchovies, finely chopped, with the tomatoes at the beginning.
Labels:
easy,
Italian,
main course,
pasta,
Simple Supper,
vegetarian
Thursday, March 12, 2015
Wet Tacos
Did I mention that I love tacos? Here is another delicious taco recipe. It is a bit messy to eat because the filling is wet and tends to drip all over the place, but that is also part of the charm of eating it. This stew also tastes delicious over rice and is certainly less messy to eat that way.
The recipe is based on my friend Greg's "Hot Meat" dish which he made for me when we were in college. His version was a bit simpler but no less delicious--take a jar of prepared salsa and stew the meat in it. You will notice that in my recipe, the "sauce" is essentially a salsa!
This dish would also be lovely made with chicken instead of pork. Use a combination of chicken thighs and breasts for the best flavor and follow the same procedure as the pork.
Serves 4 to 6 as a stew on rice, and 6 to 8 as tacos.
1.5 kilos pork shoulder (or chicken)
6 to 8 cloves garlic (about half a head)
2 onions
1 can crushed tomatoes (500 grams)
2 bunches cilantro
1 tsp cumin
zest and juice of one lime
salt and pepper to taste
olive oil for frying
2 to 4 small flour or corn tortillas per person
lime wedges, sour cream, and cheese to garnish
Cut the pork shoulder into chunks. The smaller pieces you cut, the shorter the cooking time. I usually do it in walnut sized pieces. Heat a large cooking pot on high heat. Add a bit of olive oil and put a single layer of pork pieces in the pot. Brown on one side and turn over and brown on the other side. Remove the pieces into a large bowl and put another layer of pork in the pot. It will take 3 to 4 batches to get all your pieces browned. Do not be tempted to try to hurry this process and put more pork in at a time. You will just end up with a watery mess because the heat will not be enough to brown the pieces. If the brown bits at the bottom of the pan threaten to burn, in between batches, you can rinse it with a tablespoon of water and add these juices to the bowl.
While the pork is cooking, peel your onions and chop roughly. I usually cut the onions into quarters and then slice them. Peel and chop your garlic. Chop the cilantro (incluidng the finer part of the stemps). Zest the lime and cut in half. When the pork is all browned, set it aside in the bowl. Add a bit more oil to the pot, if ncessary, lower the heat to medium and pour in the onions and garlic. Stir and cook for a few minutes until translucent. Add the tomatoes, cumin, salt and pepper and stir until combined. Add half of the chopped cilantro, saving the other half to stir into the meat before serving. Add the pork and the juices in the bowl. Add the lime zest and juice. Stir until combined. Bring the juices to a boil and then turn the heat to very low. Do not be tempted to add water, even if the mixture looks dry because the meat will release a lot of water as it cooks. Put on the lid and let it cook for an hour.
The stew after all ingredients have been added. |
The meat is tender but the sauce needs to be reduced. |
After an hour, check the stew for seasoning. As you stir it, the pork should be very tender and start to break up. If the pork needs a bit more cooking, put the lid back on and cook for a further half hour. Once the pork is sufficiently tender, take the lid off and cook for an additional half an hour or so to reduce the sauce (You can make the reduction go more quickly by increasing the heat but then you have to watch it and stir more carefully to make sure it does not burn). Right before serving, stir in the remaining chopped cilantro.
Wrap the tortillas in tinfoil and warm in the oven at 350F (180C) for 10 to 15 minutes. Put the pork in a large bowl on the table. Lay the garnishes out in bowls on the table and let everyone help themselves to make their own tacos. Eat immediately with plenty of napkins.
Labels:
comfort food,
main course,
Mexican,
pork,
Slow Cooker
Tuesday, March 10, 2015
Chili Con Carne
Chili was from a can when I was growing up in the 1970s and 1980s in California, served in a bowl with lots of cheese on top. The first time I ever made chili from scratch was, strangely, when I lived in London for the first time. Made with ground beef and lots of vegetables and served on rice, it was a flavorful and relatively cheap way to serve a crowd. It has since become a family favorite. I like mine served with some avocado and sour cream on top, the kids like it with lots of chedder cheese. Either way, it tastes much better than the canned version.
In this recipe, I have used stewing beef, cut into small pieces. This makes for a luxury version, but I normally just use ground beef, which makes the preparation a bit easier. Ground chicken would also work well.
Serves 4 to 6
1 kilo stewing beef or ground beef
2 bell peppers
2 carrots
2 stalks celery
1 large onion
4 cloves garlic
2 cans crushed tomatoes (about 500 grams each)
2 cans kidney beans (about 400 grams each)
11/2 tablespoons brown sugar
2 teaspoons cumin
1 tablespoon dijon mustard
1 1/2 teaspoon chili powder
1 1/2 teaspoon smoked paprika
2 tablespoons soy sauce
1 teaspoon salt
1 teaspoon black pepper
1/2 teaspoon cumin seed
about 1 cup water
red chili pepper, if you like
Cut the beef into bite sized pieces. In a large pot, turn on the stove to high heat, and add oil. Fry the meat in 3 to 4 batches, putting the meat in the pot in a single layer, browning the outside. Put the browned meat in a bowl. If the browned bits at the bottom of the pot start to look in danger of burning, then add a few tablespoons of water in between batches. Stir and scrape the bottom of the pan so that all the browned goodness is melted into the water. Pour the water into the bowl with the rest of the meat. Do not be tempted to add all the meat at once, this will only lead to your meat boiling instead of browning. If you are using ground beef, use the same procedure.
While the meat is browning, prepare the vegetables. Peel and chop the onions. Peel and mince the garlic. Peel and cut the carrots into bean sized pieces. Cut the peppers into bean sized pieces, discarding the core. Once the meat is browned, add the vegetables to the pot and pour the meat and juices back in. Add the tomatoes and the drained canned beans. Do not be tempted to use the liquid from the beans because while it tastes fine, it is viscous in texture and will add an unpleasant mouth feel to your chili.
Add in all the spices, stir and bring to a boil with the lid on. Let the chili cook for half an hour and then taste and check the seasoning. Cook the chili for a further half an hour or until the meat is tender.
Slow Cooker Method: Brown the meat and then put the meat, vegetables, and spices all in the slow cooker and cook according to how long you will be away. Adjust the seasonings before serving.
Serve hot by itself with any of the following garnishes: cheese, sourcream, chopped onion, chopped avocado, or chopped cilantro. Tortilla chips or cornbread would be delicious with the chili. Alternatively, serve the chili on a bed of rice or on big oven roasted potato wedges. Cut baking potatoes into wedges lengthwise and put on a baking sheet. Sprinkle liberally with olive oil, salt and pepper. Bake in a hot oven for about 45 minutes until the potatoes are golden brown and tender inside.
In this recipe, I have used stewing beef, cut into small pieces. This makes for a luxury version, but I normally just use ground beef, which makes the preparation a bit easier. Ground chicken would also work well.
Serves 4 to 6
1 kilo stewing beef or ground beef
2 bell peppers
2 carrots
2 stalks celery
1 large onion
4 cloves garlic
2 cans crushed tomatoes (about 500 grams each)
2 cans kidney beans (about 400 grams each)
11/2 tablespoons brown sugar
2 teaspoons cumin
1 tablespoon dijon mustard
1 1/2 teaspoon chili powder
1 1/2 teaspoon smoked paprika
2 tablespoons soy sauce
1 teaspoon salt
1 teaspoon black pepper
1/2 teaspoon cumin seed
about 1 cup water
red chili pepper, if you like
While the meat is browning, prepare the vegetables. Peel and chop the onions. Peel and mince the garlic. Peel and cut the carrots into bean sized pieces. Cut the peppers into bean sized pieces, discarding the core. Once the meat is browned, add the vegetables to the pot and pour the meat and juices back in. Add the tomatoes and the drained canned beans. Do not be tempted to use the liquid from the beans because while it tastes fine, it is viscous in texture and will add an unpleasant mouth feel to your chili.
Add in all the spices, stir and bring to a boil with the lid on. Let the chili cook for half an hour and then taste and check the seasoning. Cook the chili for a further half an hour or until the meat is tender.
Slow Cooker Method: Brown the meat and then put the meat, vegetables, and spices all in the slow cooker and cook according to how long you will be away. Adjust the seasonings before serving.
Serve hot by itself with any of the following garnishes: cheese, sourcream, chopped onion, chopped avocado, or chopped cilantro. Tortilla chips or cornbread would be delicious with the chili. Alternatively, serve the chili on a bed of rice or on big oven roasted potato wedges. Cut baking potatoes into wedges lengthwise and put on a baking sheet. Sprinkle liberally with olive oil, salt and pepper. Bake in a hot oven for about 45 minutes until the potatoes are golden brown and tender inside.
Labels:
American,
casserole,
comfort food,
main course,
Slow Cooker
Subscribe to:
Posts (Atom)