Showing posts with label baking. Show all posts

Friday, December 09, 2016

Swedish Cinnamon Buns and Safrron Buns (Kanelbullar och Saffransbullar)

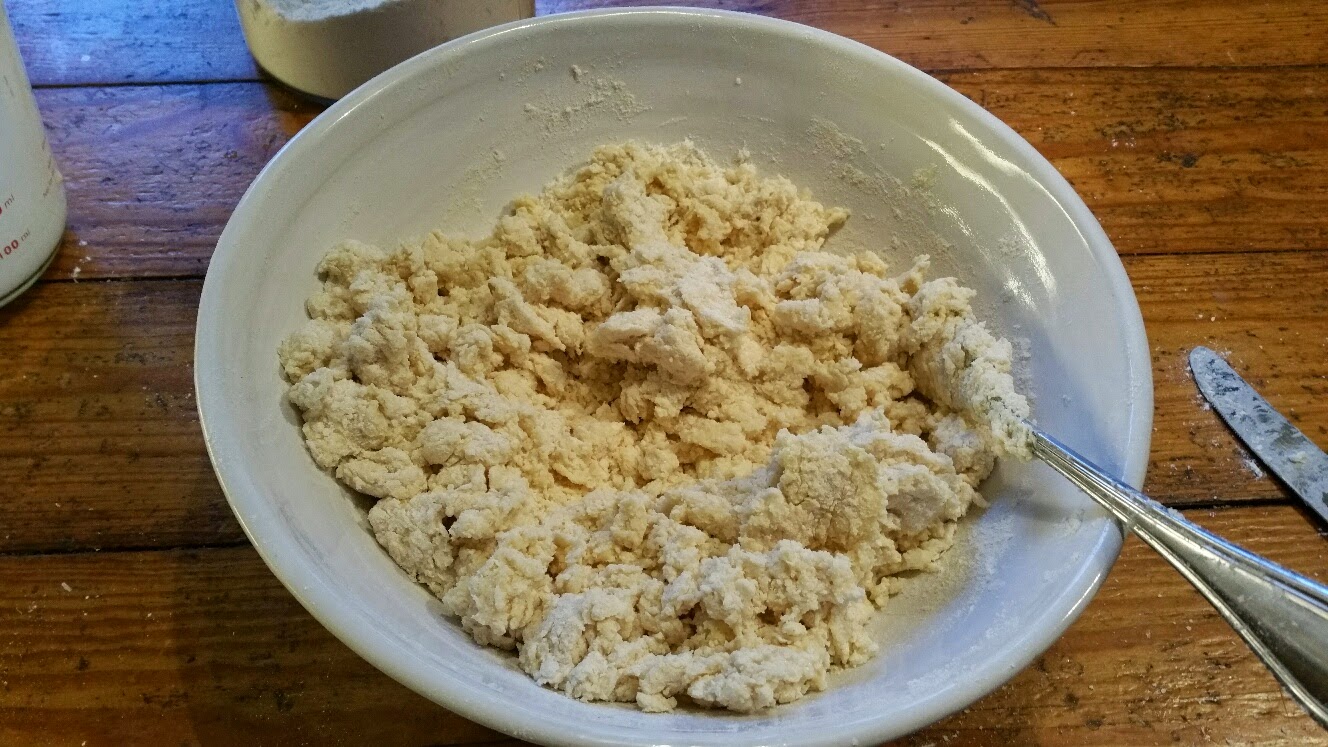
A few weeks ago, I had the pleasure of attending a baking class arranged by the SIS Out and About Club.  We had a lovely teacher, NikAnnika Märak, who taught us a few tricks.  Among other things, I learned that I have been making my dough way too dry. Our teacher kept hers very wet.  Basically you just have to have to learn to live with goopy hands.  But as you knead the dough, it becomes less sticky. 


I also learnt a new filling.  The classic filling for cinnamon buns is just butter, sugar and cinnamon.  Ms. Märak added almond meal which added a lovely subtle flavor and thickened the filling so it didn't just all drizzle out of the bun when you cooked it.

Cinnamon Buns (Kanelbullar)
About 16 buns

Dough
75 grams butter (smör)
2.5 deciliters milk (mjölk)
25 grams fresh yeast (jäst), sold in 50 grams cubes in the refrigerated section, normally near the butter
½ deciliters sugar (strösocker)
1 egg (ägg)
1 spice spoon salt (a pinch)
1 teaspoon cardamom (kardemumma)
420 grams all-purpose flour (vetemjöl)

Filling
100 grams butter at room temperature (smör)
1 deciliter almond four (mandelmjöl)
150 grams sugar (strösocker)
3 tablespoons cinnamon (kanel)
Handful of pearl sugar (pärlsocker) for garnish

Melt the butter in a small pan on the stove, or in the microwave.  Crumble the yeast into a large bowl.  Add the milk into the butter and stir.  Stick your finger into the butter/milk mixture.  It should be about body temperature.  If it feel hot to the touch, let it cool because a too high heat will kill the yeast.  Pour the butter/milk mixture in the bowl with the yeast and stir until the yeast is dissolved.  Add the rest of the ingredients for the dough (egg, cardamom, salt, sugar, and flour).  Stir the ingredients until it forms a dough.  The dough should be quite wet and sticky.  Knead the dough on the counter or on a board, using a bit of flour but not too much.  The dough will become easier to work and less sticky as you knead it.  Knead until it is smooth and elastic.  If you are kneading by hand, you cannot overknead.  Put the dough back in the bowl and dust with flour.  Put plastic wrap over the bowl and let it rise for at least 30 minutes until it roughly doubles.  If the room is cold, it will take longer to rise.

Meanwhile, mix together all the ingredients for the filling in a small bowl.

Some of the different shapes you can make.
Put the dough out onto a lightly floured board or counter.  Using a rolling pin, roll out the dough to a rectangle about ½ centimetre thick.  Spread the filling over the dough.  Roll up the dough and shape into buns.  Put the buns onto a baking sheet covered with parchment/baking paper (bakplåtspapper).  Turn on the oven to 225 degrees Celsius.

Let the buns rise for 30 minutes (a bit more if the room is cold).  Brush the buns with beaten egg mixed with a bit of water.  Sprinkle over pearl sugar (pärlsocker).  Bake in the oven 8 to 10 minutes until golden brown.

Saffron Buns (Saffransbullar)

About 16 buns

Dough
75 grams butter (smör)
2.5 deciliters milk (mjölk)
25 grams fresh yeast (jäst), sold in 50 grams cubes in the refrigerated section, normally near the butter
1 deciliter sugar (strösocker)
1 egg (ägg)
1 spice spoon salt (a pinch)
1 packet ground saffron (saffron), ie. 0.5 grams
420 grams all purpose flour (vetemjöl)

Filling, if desired
100 grams butter at room temperature (smör)
1 deciliter almond four (mandelmjöl)
150 grams sugar (strösocker)
3 tablespoons vanilla sugar
Handful of pearl sugar (pärlsocker), raisins, or flaked almonds for garnish

Melt the butter in a small pan on the stove, or in the microwave.  Crumble the yeast into a large bowl.  Add the milk into the butter and stir.  Stick your finger into the butter/milk mixture.  It should be about body temperature.  If it feel hot to the touch, let it cool because a too high heat will kill the yeast.  Pour the butter/milk mixture in the bowl with the yeast and stir until the yeast is dissolved.  Add the rest of the ingredients for the dough (egg, saffron, salt, sugar, and flour).  Stir the ingredients until it forms a dough.  
The dough should be quite wet and sticky.  Knead the dough on the counter or on a board, using a bit of flour but not too much.  The dough will become easier to work and less sticky as you knead it.  Knead until it is smooth and elastic.  If you are kneading by hand, you cannot overknead.  Put the dough back in the bowl and dust with flour.  Put plastic wrap over the bowl and let it rise for at least 30 minutes until it roughly doubles.  If the room is cold, it will take longer to rise.

Meanwhile, mix together all the ingredients for the filling, if you are using it.

Put the dough out onto a lightly floured board or counter.  If you don’t want the filling, divide the dough into 16 pieces and shape as desired, using the raisins for garnish.
For filled buns, using a rolling pin, roll out the dough to a rectangle about ½ centimetre thick.  Spread the filling over the dough.  Roll up the dough and shape into buns.  Put the buns onto a baking sheet covered with parchment/baking paper (bakplåtspapper).  Turn on the oven to 225 degrees celcius.
Let the buns rise for 30 minutes (a bit more if the room is cold).  Brush the buns with beaten egg mixed with a bit of water.*  Sprinkle over pearl sugar (pärlsocker), or flaked almonds.  Bake in the oven 8 to 10 minutes until golden brown.

You can also brush them with sugar syrup instead of egg if desired.  To make the sugar syrup, boil 1 dl sugar with 1 dl water until the sugar is fully melted.  Cool.


Thursday, August 25, 2016

Coconut, Rum and Lime Cake

The flavors of a tropical summer holiday in a cake. Need I say more?

The cake is a dense but fluffy with lots of texture from the shredded coconut.  Although it seems fiddly to do a cake, syrup and frosting, it is actually easy to make. You can eliminate the frosting but do cover the cake in the lime syrup because it creates a more intense lime flavor.

Cake:

225 grams butter, at room temperature
2.5 dl sugar
1 teaspoon vanilla
zest of 3 limes
3 eggs
4 dl flour
2.5 dl dried flaked coconut + 3 tablespoons for pan
2 teaspoons baking powder
1 teapoon salt
2 tablespoons rum

Lime Syrup
juice of 3.5 limes
1/2 dl sugar

Frosting
100 grams butter, at room temperature
100 grams cream cheese
3 dl powdered sugar
2 teaspoons rum
zest of one lime, plus juice of half a lime

Zest 4 limes and squeeze the juice.  Set aside 1/4 of the lime zest for the frosting and a tablespoon of the lime juice.

Turn on the oven to 175C (325F).   Prepare your cake pan by rubbing it with butter.  Throw in 3 tablespoons of shredded coconut and shake the pan so that the coconut evenly covers the bottom and side.  This will both help the cake from sticking to the pan and create a nice crust.  Set aside pan.

In a large mixing bowl, mix the butter, sugar, vanilla, and rum together until light and fluffy.  Add in the lime zest, flour, salt, and baking powder. Beat carefully until all the dry ingredients have been incorporated but do not overmix. Add in the coconut and stir until it is evenly distributed through batter.  Pour the batter into the prepared pan and bake in the oven from 35 to 45 minutes. The cake will be brown and top and a toothpick will come out clean when it is done.

While the cake is baking, make the lime syrup.  Take the juice of 3.5 limes and add 1/2 dl sugar into a small pot.  Put on the stove and bring the lime juice to boiling.  Take the pot off the stove and set it aside to cool.

When the cake is out of the oven, take a fork or toothpick and poke holes all over the top.  Spoon over the lime syrup, trying to cover the cake evenly.  Set the cake aside to cool.

When the cake is cool, make the frosting.  Whip the cream cheese and butter together in a bowl.  Add in about a third of the powdered sugar, the rum, and about half of the lime juice.  Whip together and add in the rest of the sugar.   The frosting should lighten in color and get very fluffy.  If you wish the frosting to be stiff (if you want to pipe it onto the cake and have it hold its shape), then you will need to add more sugar.  I like it looser and I just spoon it on top of the cake.  Adjust the lime juice and to your liking, remembering that the more liquid you add, the looser the consistency of the frosting.

Unmold the cake and put it on a serving plate.  Smooth the frosting over the top of the cake only, letting the sides of the cake show.

Store leftover cake in the refrigerator.


Tuesday, June 28, 2016

Paris, crêpes, and Mary

The family and I went to Paris to start out our summer vacation this year.  It was really fun to see Paris through the kids' eyes and to have an excuse to be a tourist.  The kids loved the Louvre and Eiffel Tower and even wanted to climb up the Arc de Triomph. They were unimpressed with the beauty of the avenues and prefered to sleep in taxis rather than admire the view.  They did not want to sit in a cafe all day (what?!) but loved the food markets, fresh crusty baguettes and eating Vietnamese pho noodles for the first time.  And as all good tourists do, we had several crêpes for snacks in between seeing sites. 
Which led us to understand that we really needed a râteau en bois to take home.  Yes, that's right.  A 
wooden crêpe batter spreader thingy. The ultimate Paris souvenir. You heard it here first folks!

Mary and I cooking together.
So, today we tried making crêpe with our rateau.  The recipe I use now is from my friend Mary, so I always think of her whenever I make crêpes.  Mary was an amazing cook and the last time I saw her, we made a huge pile of crêpes together for a party.  We made the crêpes in advance during the day.  To serve, we just reheated them in the oven, wrapped in foil.  We had a big bowl of whipped cream, another huge bowl of berries, and some chocolate sauce. Guests filled their own crêpe and we had a long line of very happy customers.  I am so privileged that my last memory of Mary was such a happy one, full of laughter and good food.  I think Mary would have approved of the râteau.  She probably would have been better at using it than me!
To be honest, it wasn't that much easier to use the râteau than to just swirl the batter in the pan. It takes a light touch on the rateau not to tear the delicate batter and it took a few tries before we managed to make a good looking crêpe.  The main thing that is better with the râteau is that you don't have to be in such a hurry, like you do when you swirl the batter.  In fact, you need to wait a few seconds after you have poured in the batter before you spread it with the râteau. So the process is a bit calmer.  Whether you decide to swirl or use a râteau, the crêpes will taste good all the same!

You can put almost anything on your crêpes.  My personal favorite is the simplest, just a sprinkle of sugar and lemon onto the hot crepe.


Mary's Cr
êpe Recipe
Makes  about 10 crêpes:
1 cup all-purpose flour
1 tbsp sugar
1/4 tsp salt
1 cup milk
1/3 cup water
3 eggs
3 tbsps butter, melted

1.       Combine the flour, sugar, and salt in a food processor and process briefly.
2.       With the motor running, add the milk, water, and eggs,  through the feed tube.  Process until smooth.  Alternatively, you can beat the batter with a whisk by hand.
3. Pour the batter into a bowl and then add the melted butter slowly, whisking all the time.
3.       Heat a heavy 7-inch nonstick skillet (mine is a 9-inch) until quite hot.  Pour in 3 tbsps (I use a 1/4 cup) of the batter, then quickly tilt the pan so the batter spreads evenly, forming a crepe.  
4.  If using a râteau, pour in the batter in the center of the pan.  Wait a few seconds and then gently use the rateau to swirl the batter around to the edges of the pan.
5. Cook until lightly brown, 30 to 45 seconds; then turn and cook another 15 seconds.
6.       Repeat, using up all the batter.  As you finish the crêpe, stack them between sheets of waxed paper to prevent them from sticking or serve them at once, hot from the pan.  If making crêpes for later, wrap the stacked crêpes in plastic wrap.  They will keep in the refrigerator for 2 days.  To re-heat, simply wrap them in foil and heat them in the oven. 


Sunday, July 26, 2015

Mom's Cheesecake

When I was in college, my best friend and I would sometimes take my scooter and ride to a little restaurant next to the beach in Aptos.  There, we would ask for one slice of cheesecake, to go.  We would take our shared treat and eat it out on the beach, savoring each precious morsel.  We couldn’t afford to each have a slice of the cake, never mind actually go to the restaurant and have a meal.  But we could, every now and then, eat a slice of that cake, slowly, thoughtfully and with great relish.

However, as good as that cheesecake was, my mother’s cheesecake is, in my view, the best one there is.  It is distinctly not in the style of NewYork cheesecake, so thick, dense, and rich.  It is instead, light and fluffy with just a hint of spice, in the buttery graham cracker crust. Dinstincly moreish.  I made this cheese cake again, not so long ago, wondering if the childhood memory of the cake was better than the actual cake.  Nope, the cheesecake was even better than I remembered!

Crust
1 cup (2.5 dl) graham cracker crumbs (or digestive biscuits—about 7 biscuits)
1/4 cup melted butter (60 grams)
1/4 cup sugar
1/4 teaspoon cinnamon
1/4 teaspoon nutmeg

Put the graham crackers or digestive biscuits in a food processor and whizz until the crumbs are fine and evenly sized.  If you don’t have a food processor, you can put the crackers in a bag and whack it with a rolling pin. Add in the melted butter, sugar and spices and mix until well combined. Pat mixture over the bottom of a 9 inch spring form pan, up about 1 inch to the sides of the pan.


Filling
4 eggs
1 cup sugar
1 cup sour cream*
1 teaspoon vanilla
2 tbsp flour
¼ tsp salt
1 pound cream cheese (450 grams)

Set the oven at 325 degrees F (165 C).

Take out two large bowls Separate 4 eggs, putting the whites in one bowl and the yolks in another. Beat egg whites until stiff with 1/4 cup sugar.  Set aside.


In the other bowl, beat egg yolks until thick and foamy, a few minutes.  You will see the yolks lighten in color and become thick. 
Add 1 cup sour cream and 1 teaspoon vanilla.  Beat in 3/4 cup sugar, 2 tbsp flour, and 1/4 tsp salt.  Stir in bit by bit, 1 pound cream cheese.  Beat until smooth.  Fold in  a third of the eggs whites and mix well to lighten the mixture.  Carefully, fold in the remaining egg whites, mixing just enough to combine the mixture but no more.  There can be a few lumps of egg white in the batter.

Pour the cream cheese mixture into pan and use a spatula to make sure the batter fills the pan evenly and smooth the batter on top.  Bake about 1 hour until firm to the touch in the center and golden brown.  The cake will be puffed up and may have cracks in it.  When the cake cools, it will deflate. Cool and then chill in the refrigerator.  Run a sharp knife around the edge of the cake before taking off the rim. It tastes great both at room temperature and chilled.

If you must, you could put some lemon zest into the filling.  You could also spread a thin layer of sweetened sourcream over the cake once it has cooled. Some fresh berries will taste wonderful with this cake.

*You can substitue yogurt for the sourcream.  If the yogurt is a thin yogurt, then add an extra tablespoon of flour.


Thursday, July 23, 2015

Rye No-Knead Bread with Orange, Fennel, Anis, and Cardamom

I love the spiced Swedish "limpa" that is so popular here in Sweden.  Limpa means "loaf" in Swedish but refers to a particular type of bread which is spiced and has a lot of sugar syrup in it to sweeten it. It is particularly popular at Christmas. Swedes routinely put various spices into their bread. For example, most sweet breads, like cinnamon rolls, have cardamom in the dough. The old fashioned limpa generally has "bread spice" which you can buy pre-mixed in a packet in Sweden.  The other day, I decided to try to mimic this flavor using my quick and easy no-knead bread recipe. I added a bit of rye flour to get a more earthy flavored bread and dumped in a bunch of spices.  A tad more honey and a generous amount of raisins give it sweetnes.  I stuck it in the oven, crossed my fingers and hoped for the best.  The loaves were delicious! Both loaves were polished off by me and my two sons in one afternoon...we were so full of bread that we skipped dinner.  There was just a small bit left in the morning, which my sons ate for breakfast.  I call that a success.

2 loaves


25 grams fresh yeast

3 dl water
1 dl filmjölk, buttermilk or yogurt
1 tablespoon salt
2 tablespoons honey
9 to 11 deciliters flour
1 dl fine rye flour
1/2 teaspoon ground cardamom
1 teaspoon ground fennel seeds
1/2 teaspoon ground anis seeds
zest of one orange
about 1 dl orange juice
2 dl raisins

In a large bowl, pour in the water, which you have run from the tap

to feel warm but not hot with your fingers.  If the water is too hot, it will kill your yeast.  Crumble in the yeast and stir until the yeast is dissolved.  If your spices are whole, grind them now in a mortar and pestle or other spice grinder.  Add the ground spices to the yeast.
 Zest the orange and add to the yeast mixture.  Cut the orange in half and then juice the orange. It should be about 1 dl.  Add the orange juice to the bowl. Add in the filmjölk, salt, and honey. Stir to combine.

Dough after all the flour is mixed in.
Add the rye flour and then the regular flour, a bit at a time until the dough starts to form a ball. At first it will look like you have too much flour and it will look shaggy.  Stir it a bit more and the flour will absorb more
Dough with raisins forming a ball.
water. Give it a good stir to make sure that all the flour is well mixed in. 
If you have the perfect ratio of flour and liquid, it will come together as a ball and your bowl will be clean, although the dough will still be very
Dough doubled after 2 hours.
sticky.  But if this doesn't happen, don't worry. This recipe is forgiving.
Add the raisins to the dough and mix again until the raisins are nicely distributed through the dough.  Cover the bowl with a clean cloth and let stand in a warm and draft-free place for 1 ½ to 2 hours.  The dough should more than double.

Pre-heat an oven to 225 degrees C.  Pour the dough out onto a well floured board or smooth counter-top.  Divide the dough into two pieces, making sure your hands are well floured.  Lay each piece onto a baking sheet covered with parchment.  Dust each loaf with flour.  Let it rest with a cloth over it while the oven warms. When the oven is hot, you can slash the loaves with a very sharp or serated knife, if you like.  The dough is quite soft so if your knife is not very sharp, it will just mush the dough.  If so, you can just skip this step.  You do not need to let the bread rise a second time, it will rise further in the often. 

Bake in the middle of the oven for 20 to 25 minutes until nicely golden brown on top.  Take out and let cool, preferably on a rack of some kind, in order to let the moisture from the bread dissipate.  If you just rest it on your cutting board, the moisture coming out of the bread as it cools will make your crust soggy.

Friday, March 20, 2015

Scones and Lemon Curd

I take great exception to the huge pastries that are ubiquitous in every American bakery and supermarket that they call “scones.”  Sweet and filled with all kinds of fruit from cranberries to apricots and the size of a doughnut, these pastries, while some may like them, are not scones.  Indeed they defy the entire spirit and quiet beauty of a scone.  First, a scone should be eaten hot from the oven.  Cold, they lose half of their appeal. Second, the scones should have very little flavoring, just a small smattering of sugar, and perhaps a bit of lemon zest or a small amount of currants, if you must.  Then, scones should be eaten with strawberry jam or lemon curd (or both!), and either whipped cream or clotted cream.  The contrast between the warm, flakey, buttery biscuit and the sweet jam mixing with the richness of the cream is sublime.  Don’t settle for less.  Make these and understand why scones are so beloved.  You will never eat a grocery store scone again.

Cream Scones


2 cups flour
2 teaspoons baking powder
2 tablespoons sugar
1/2 teaspoon salt
4 tablespoons of COLD butter (60 grams)
1/2 cup cream
2 eggs

Preheat the oven to 425F (220C).  

With a food processor:
 In a food processor, pour in the dry ingredients.  Pulse for a few seconds to combine.  Add the butter and pulse for about 20 to 30 seconds until the mixture resembles cornmeal.

By hand:


In a large bowl, pour in the dry ingredients.  Add the butter and cut it with a knife or pastry cutter until it is in small pieces.  You can also take your fingers and smoosh the butter and flour between your fingers.  You want the butter to be in tiny pieces, so don't overwork it.

Measure out the cream in a masuring cup.  Add the eggs into the cup and beat well with a fork to combine.  Pour the cream mixture into the food
processor and pulse until the mixture is nicely combined but do not mix more than necessary.  If mixing by hand, pour the cream and egg mixture into the bowl and use a fork to mix into the dry ingredients.  Stir until the mixture comes together and starts to form a ball.

Turn out the dough onto a floured board.  The mixture will be sticky and fairly loose.  Dust your hands with plenty of flour and knead the dough for 30 seconds or so.  Roll or pat the dough out with your hands to about 1/2 to 3/4 inch thick.  Cut into wedges, diamonds, or squares.   You can cut circles out, also, but the more you re-knead the dough, the less flakey the scones will be.  Place on a buttered baking sheet.  Bake until puffed and golden brown.

For small scones, about 24, bake 8 to 10 minutes.
For medium sized scones, about 12, bake about 15 minutes.

Serve hot with jam or lemon curd and whipped cream or clotted cream.


Lemon Curd


Makes about 2 cups (500ml)

4 large lemons, zest and juice (about 1 1/3 cups/250 ml)
150 grams butter
200 to 250 grams sugar
1 tablespoon cornstarch
3 eggs plus 2 yolks

Zest the lemons into a large heat-proof boil that you can put over a pan of boiling water.  Juice the lemons and pour into the bowl. Add the sugar, cornstarch, and butter.  You can adjust the sugar more or less, depending on how sweet you would like your curd and how much juice your lemons give. Heat some water in the pan to boiling, making sure that the water is below the level of the bowl. When the water is boiling, put the bowl on top of the pot and stir or whisk until all the ingredients are incorporated.  For the next 5 minutes, stir occassionally, keeping a close eye on the bowl.  For the next 5 to 10 minutes, stir constantly until the mixture starts to thicken. Do not despair if nothing appears to be happening, it will thicken when it gets to about 170 F degrees, just under boiling temperature, and how long this takes depends on the heat of your stove and the size of your pot.

Once you feel the mixture thicken, it should start to feel heavier on your spoon or whisk.  Continue stirring for another two minutes, but do not let the mixture come to a boil or it will curdle. The mixture should be able to coat the back of a spoon, but will still be runny.  It will thicken a bit more as it cools.  Pour the curd into very clean jars and refrigerate.  It will keep a week or two, more if you steralize the jars and seal them.


Sunday, December 28, 2014

Old Fashioned Drop Doughnuts

I have been wanting to make doughnuts for a long time.  I can remember when I was a child living in Africa, my mother sometimes made doughnuts.  Hot, dusted in sugar, right out of the hot oil, there could not be anything tastier to a greedy child.

In November, I mentioned my doughnut desire to my friend Aiai, and she said that she made doughnuts quite often and offered to make some for me, an invitation which I immediately accepted. Her doughnuts were made from a yeast dough and allowed to rise overnight.  While they were delicious, I was looking for something a little different; a more cakey doughnut.  And, as I am not as energetic as Aiai who thinks nothing of whipping up doughnut dough before she goes to bed, I wanted something easier.

Doing doughnut research, I found a recipe for doughnut holes.  A quick baking powder type of batter, seemed to be just the ticket. Another similar recipe suggested flavoring the batter with nutmeg.  Both recipes dipped the doughnuts in a simple powdered sugar glaze, but the powdered sugar here in Sweden has potato starch in it and I find it gives the sugar an off taste which I do not like.  So, I decided that a sprinkling of granulated sugar would do. Today, using the excuse of a visit from friends Marybeth and Patrik, I tried the recipe.

The photos of one of the recipe showed perfectly round doughnut "holes" but I was unable to create this and had "blobs" instead, which I think were actually better because the little crispy wisps tasted wonderful. While these are best hot, I can report that they are equally delicious cold the next day, but it it unlikely that you will have any left over.

Makes enough for 4 greedy persons, 6 normal.

5 cups or so of vegetable oil, for frying
1 cup milk
1 large egg
2 cups all-purpose flour
2 tablespoons sugar
4 1/2 teaspoons baking powder
1/2 teaspoon salt
1/4 cup (60 grams) butter
1 teaspoon vanilla
½ teaspoon ground nutmeg
½ teaspoon ground cardamom
Grated zest of one lemon
Granulated sugar to roll the finished doughnuts in
Cinnamon, if desired

Add the vegetable oil to a large, heavy-bottomed pot so that there is 2 to 3 inches of oil in the pot.  Heat the oil to 350 degrees F, measuring with a candy or deep fryer thermometer.  Prepare one plate with some paper towels on it for draining the doughnuts and one plate with granulated sugar on it (into which you can sprinkle some cinnamon if you like), to roll the finished doughnuts in.
Melt the butter in a microwave or in a small pan on the stove. In a bowl, whisk together the flour, sugar, baking powder, spices and salt. Make a hole in the flour and add the egg and milk.  Whip the egg with a fork and then stir together, incorporating the flour.  Add the melted butter and combine well.
Once the oil has reached 350ºF, drop about 1 tablespoon scoops of dough into the oil, careful not to overcrowd the pan.  You can use two spoons for this job or a small ice-cream scoop.  Fry the doughnut “drops”, flipping them in the oil, for about 2 to 3 minutes or until they're golden brown.  Remember to keep an eye on the temperature and adjust the heat up or down to maintain the oil at around 350 degrees.  If you are unsure whether the doughnuts are done, you can take one out and cut it in half to see that the inside is no longer gooey.


Using a slotted spoon, transfer the finished doughnuts to the paper towel-lined plate, just to absorb the excess oil.  Then move the doughnuts to the sugar plate, rolling the doughnuts in the sugar.  Best eaten hot.

Wednesday, December 24, 2014

Christmas Cookies: Pepparkakor

I love the holidays.  I love the crisp cold air, the festive lights and displays in store windows, the happy smiles of children, and sipping hot chocolate with marshmallows in front of a fire.  Put some mint schnapps in the hot chocolate, and life is even better! I also love holiday traditions, which is probably because I grew up in a house without any holiday traditions.  When I was old enough to care, this seemed to me a great freedom.  One year for Christmas dinner we might have a ham, another year a goose.  Or we might just go out to a Chinese restaurant instead.  We experimented and we had a lot of fun.  I pitied my friends who had to have the same boring ham every year.

On the other hand, my parents didn’t really care about Christmas or the holidays.  While my brother and I were children, they went through the motions.  They decorated a tree, perpetuated the Santa Claus myth, and we woke up to wrapped presents under the tree.  But as I got older, it was always me who decorated the tree and me who planned the Christmas dinner menu.  On the last year before I moved away to University, it seemed I was the only one who cared at all.  No one had made any Christmas preparations, bought a tree, or decorated the house.   The day before Christmas, I went out to get a tree, which was kind of ragged and sad looking being one of the only three left in the tree lot.  I decorated it all by myself.  Everyone laughed when they saw the tree; it was so scraggly and forlorn.

Perhaps this is why, when I had my own children, I was determined to have things for them to look forward to, to create that magical Christmas spirit that they would enjoy, not just as children but as adults also.  So my husband and I have made our own traditions.   Fun traditions.  One of our favorite traditions is making cookies to decorate our tree.  When our first son, Gustaf, was just two years old, inspired by a magazine cover, I decided to make some cookies and hang them on a tree.  I made stars, snowflakes, and gingerbread boys.  Since I was the only one decorating, they were decorated with only white frosting in delicate curlicues with an occasional silver dragee.  They were elegant and looked fabulous on the tree. 

Peter was inspired by my efforts and made a batch of the Christmas cookies of his childhood, a ginger cookie and insisted that I buy a pig cookie cutter, which is a traditional Swedish shape. My white decorations looked fabulous on those, also. 

When the children were very small, they loved these cookies, so much so, that we had to keep a vigilant eye on the tree to make sure that the cookies stayed on through Christmas.  We let them eat one cookie each on the days leading up to Christmas, and then we let them go at it when Christmas was through.
 

When the children got a bit older, they were not content to let me decorate the cookies by myself, they wanted to help.  I can confess that the first year that they decorated; I let them eat their creations and only hung up my own.  But the next year, they were old enough to notice that I wasn’t hanging up their cookies and insisted that theirs be up there too.  So, I hung up their cookies, with their blobs of frosting and off-kilter smears.  When the cookies were all hung, I realized that even the worst decorated cookie, artistically speaking, still looked great.  All the colors just blurred into a happy, comforting, delicious looking tree.  When the boys were 4 and 7, I asked them what was their favorite thing about Christmas, expecting the answer to be the presents, but both boys said without hesitation, “Decorating the Christmas cookies!”  They still love it and so do I. Here is the recipe for Swedish pepparkakor, a spiced ginger cookie.

2 dl sugar
1 dl water
1 dl light syrup
125 grams butter
1 tablespoon ground cinnamon
½ tablespoon ground cardamom
½ tablespoon ground cloves
½ tablespoon ground dried bitter orange peel (pomeransskal)*
1 teaspoon ground ginger
Grated zest of one orange
7 dl (about 375 grams) of all purpose flour
½ tablespoon baking soda

Cut the butter in pieces and put in a large bowl.  Measure out all the spices and put them in the bowl with the butter.
Combine sugar, water, and syrup in a saucepan and heat on the stove until it reaches a rolling boil.  
Pour the hot sugar mixture over the butter and stir until the butter is melted.  Let the mixture cool until room temperature.  Mix in the flour and baking soda to form a loose dough. Cover the bowl with plastic wrap and let the dough sit in the refrigerator overnight (or longer).  The dough will firm up as it sits.

When ready to bake, take a small portion of the dough and knead a bit.  Roll out the dough on a floured board and use cookie cutters to cut into whatever shape is desired.  You can use a thin spatula to help you lift up the cut cookies.  Lay the cookies on a buttered baking sheet or a sheet with parchment paper.  Bake in an oven 180 C (350 F) for about 8 to 10 minutes, depending on the thickness of the cookie.  Keep an eye on the first batch to see when it is done because these cookies are easy to burn.

You can garnish the cookies with almond halves, if you like.  Press the halves firmly into the dough before baking.

*Pomeransskal, dried bitter orange peel, is readily sold in Swedish stores.  If you cannot find this, you can increase the amount of fresh orange zest or omit it all together.