My son Gustaf is a big pie lover. He loves it so much that he has pie every year for his birthday instead of cake. Rhubarb is one of his favorites, which is lucky since it is in season during his birthday. At our summer house, I have planted a rhubarb on a sunny hillside where it basically grows without any care from me. Every now and then I think about weeding it and then usually decide to do something else. Depending on the kind of rhubarb you have, the pie filling can turn out to be a greenish shade. To tip the filling over to red, it is traditional to add strawberries. This year, I decided to add red currants, which I have in the garden. This turned out to be an inspired choice because the red currants do not overpower the rhubarb flavor and they give a spectacular color. They also contain a lot of pectin which helps the filling set.
Because I made this as a birthday pie, I decided to use a lattice crust, to give it an extra special feeling. I think you will agree, that the lattice looks gorgeous with the red fruit filling peeking through. It is actually very easy to make a lattice crust with this method, which I show in photographs, although of course it does take more time. I got this method from the amazing Pie by Ken Haedrick. I highly reccomend this book if you are interested in pie.
Classic all butter pie crust
(2 crusts)
3 cups flour (350 grams)
1 tablespoon sugar
½ teaspoon salt
1 cup (2 sticks/225 grams) cold butter, cut into small pieces
½ cup (8 tablespoons) cold water
With a food processor:
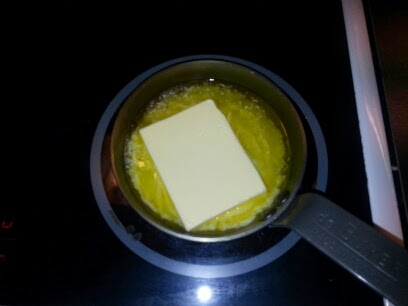
 Put the flour, sugar and salt into a food processor and pulse several times to mix. Add half of the butter to the mixture and pulse 6 or so times. Fluff up the mixture with a fork, making sure to get all around the sides. Add the rest of the butter and pulse again about 6 times. Fluff with a fork again. Add about half of the water and pulse 6 times. Fluff again. Add the final half of the water and pulse 6 times. When it is ready, it will be starting to form some clumps. Don’t let it completely form a big ball, because you will over process it. You want the butter to be in tiny pieces, not completely amalgamated. It is the process of the butter melting and steam forming in the dough that makes the pie dough flakey.
Turn the dough out into a big bowl and knead once or twice, just so the dough comes together in a big ball. Divide the mixture into two even sized balls. Wrap each ball in plastic wrap, flattening them out while you wrap. Put the balls in the refrigerator for at least one hour. You can also freeze the dough now, if you want to save it for a later use.
By hand:
If you do not have a word processor, you can do it by hand. After adding the butter and shortening, use your fingers to smear the butter into the flour. After a bit, you will find the mixture resembling a coarse crumble. Try to work it quickly so that the butter doesn’t melt and don’t overwork the dough. It should not be smooth and even, but have little blotches of butter in it. Add the water and mix the dough, kneading it a few times, just enough so that the dough holds together and can form a ball. Divide the mixture into two even sized balls. Wrap each ball in plastic wrap, flattening them out while you wrap. Put the balls in the refrigerator for at least one hour. You can also freeze the dough now, if you want to save it for a later use.
Rolling the crust:
Take the ball of dough out of the refrigerator about 15 minutes before you want to use it to let it warm up a little bit. On a floured pastry cloth or floured piece of wax paper, roll out one of the pieces of dough, large enough to fit your pie pan. Because the dough is cold, it will have a tendency to crack, so don't roll with too much pressure at the beginning. If the dough is not yet malleable enough to roll, just leave out for another 10 minutes and try again.
Roll the dough over your rolling pin and lift it onto your pan. Smooth the dough out into the pan, leaving the excess dough hanging over the edge of the pan. Stick the prepared crust into the freezer while you prepare the filling. Freezing the crust helps it from getting soggy in the beginning of the baking and also helps to protect the crust when you are putting the filling.
Rhubarg and Red Currant Filling:
about 700 grams of rhubarb (3 to 4 large stalks)
about 150 grams red currants (about a cup)
about 325 grams sugar (1 1/2 cup)
a teaspoon ground cardamum
a teaspoon ground cinnamon
a pinch of salt
5 tablespoons flour
 Cut the rhubarb in half lengthwise or in quarters if the stalk is very thick. Chop into dice about one centimeter wide. Pour into a large bowl. Add the red currants, sugar, salt and spices. Stir until all the fruit is covered evenly with the sugar mixture. Taste a piece of fruit. If you think it is too sour, add a bit more sugar. Add in the flour and stir again until the flour is evenly mixed in.
Preparing the pie:
Preheat the oven to 400F(200C). Take the crust out of the freezer and pour in the filling.
 Roll out the second crust and slice into 8 even strips, about 2.5 to 3 cm wide. These will form your lattice.
 Roll out the second crust and slice into 8 even strips, about 2.5 to 3 cm wide. These will form your lattice.
 1) Lay the longest strip in the center of the pie and then arrange two shorter pieces on either side, for a total of five strips. In this picture, I forgot the middle strip and had to move my strips over to get a fifth strip in, which you will see in the next picture.
 2) Pull back the two strips on either side of the center to a bit more than half way. Lay another long strip in the center, perpendicular. Fold the two strips back down.
 3) Fold back the center strip about a third of the way and the two outside strips, and lay another strip down, perpendicular. Fold the three strips back. You have finished half the pie.
4) Now do the same on the other side. Fold back the center strips and two outside strips. Lay the last strip down and fold the three strips back. You are done with your lattice! Take a second to admire your work.
5) Now, trim the strips and the first crust so that there is an even overlay of about 3 cm. Fold and roll the crust outside, tucking it underneath the bottom crust, leaving a ridge of about a cm. Crimp the crust with your fingers, or use a fork to make a pattern. Your pie is done!

If you want to gild the lily, you can brush the crust with a beaten egg, or a bit of cream so that it will bake up shiny and nice. I had a bit of cream in the fridge, so that is what I used. You can be happy with that, or you can sprinkle some sugar or nuts over the crust. I was going to use rock sugar but I didn't have any at hand, so I decided upon some sliced almonds.

Put the pie in the oven and turn down the heat to 375F (190C). Bake for 40 minutes and then turn the pie around 180 degrees. Bake for a further half an hour or until the filling is bubbling thickly in the center of the pie. It can take up to an hour and a half in total, depending on your oven. Check to make sure it is not getting too brown on the crust, if so, shield it with a piece of tinfoil.
Let cool, ideally for a few hours so that the filling has time to thicken. Serve with vanilla icecream.